 3DWebWorldz.com
Building in 3DWW - Getting Started
PLEASE NOTE:Based on user suggestions our toolbars have been moved to the BOTTOM. Please look for the EDIT TOOLS button on bottom left (instead of top right as seen in the pictures). Thank you! So, you have decided to take the the leap to build your own region in 3DWebWorldz. What now? Before you get started, know this, if you take just a little time to understand the building tools and how they operate, they are super easy.
If you don't...you will get frustrated. So, if you choose the latter, have your hammer ready and pre-order a new monitor on Amazon.
WHERE CAN I BUILD?
You can only build on a region you own, or a region where an owner has given you rights.Region owners beware, if you give someone rights to build on your land they can burn it to the ground.
 Your New World
Your region comes equipped with an ocean... and that's it.
Read through this tutorial to give yourself a lifeboat.
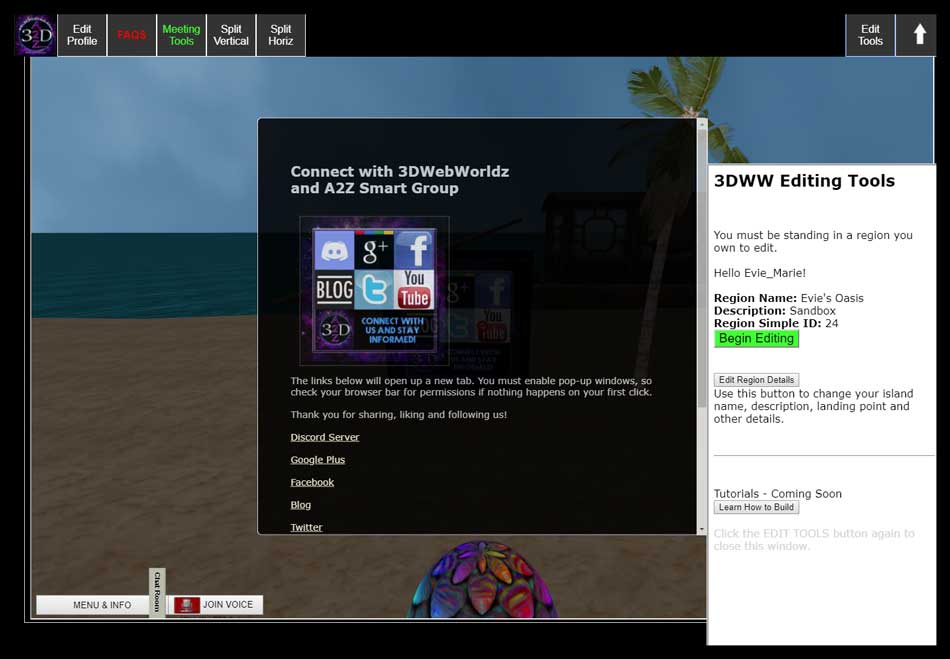
The 3dWW EDITING PANEL
 Navigate to your world and open the editing panel by clicking the EDIT TOOLS button in the top right of your screen.
If something gets borked or you accidentally leave it open during teleport between lands, just click the EDIT TOOLS button twice to reset. This will close the panel and reopen it.
Navigate to your world and open the editing panel by clicking the EDIT TOOLS button in the top right of your screen.
If something gets borked or you accidentally leave it open during teleport between lands, just click the EDIT TOOLS button twice to reset. This will close the panel and reopen it.
Region owners, don't worry. If someone has the panel open and teleports to your land, unless you have given them rights, they will not be able to cause damage.
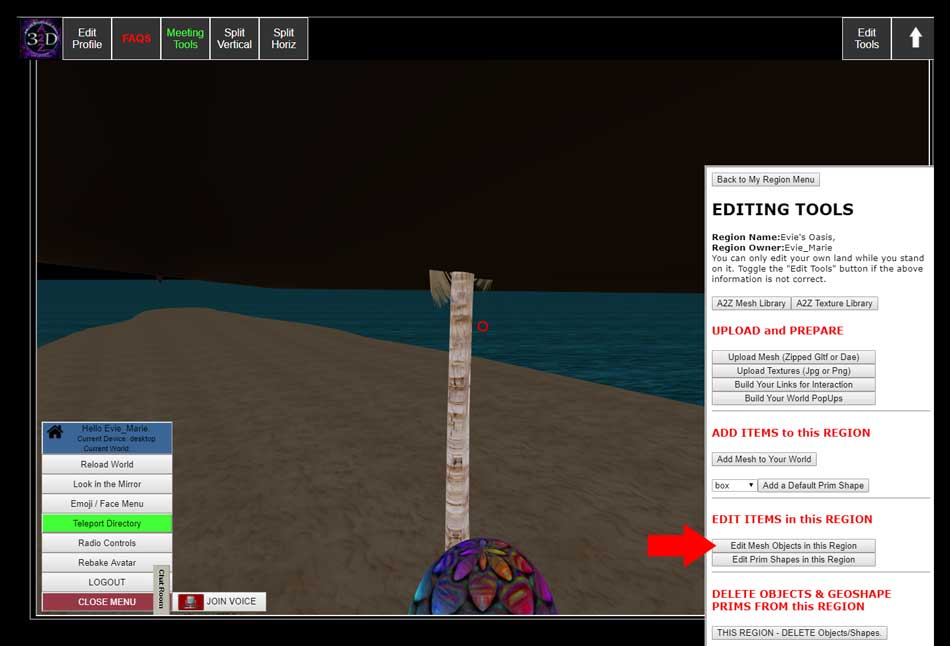
EDIT TOOLS
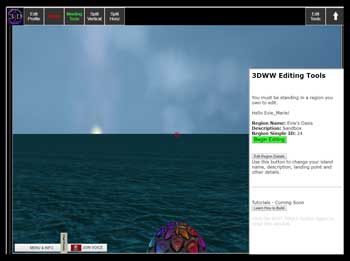 On the first panel, you will find your basic region information and two buttons.
 BEGIN EDITING - BUTTON To add, edit, delete items in your world, click the GREEN button.
EDIT REGION DETAILS - BUTTON Use this button to edit the basics like your region name and description shown on the teleport menu.
You can also adjust your landing point, make your land public/private, active/inactive, as well as give rights to users to help you build or access your private land.
Private Lands will show up on the teleport menu, but will only allow visitors with access to enter.
We'll get back to the region details later...let's first give ourselves a lifeboat so you don't get tired of dogpaddling!
MAIN EDIT PANEL

LET'S GET STARTED
We promised you a lifeboat. Let's pull a boat from the library inventory.Click the A2Z Mesh Library button (see image above) and let's see how that works. Please note the library will open in another tab on your browser. Depending on your browser settings, you may need to accept the mesh library as a "pop-up" window from A2ZSG.com.
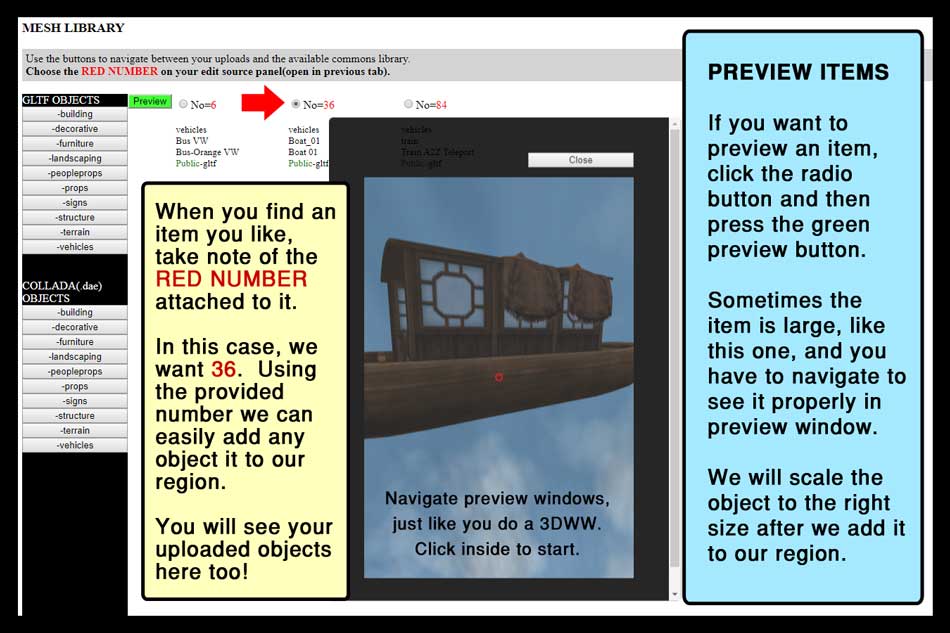
In addition to the boat, look under the terrain and landscaping buttons. While we are at it, let's add a palm tree and a sand dune. Don't forget to take note of your item red numbers. This will save you time and make things super easy!
When you are done, you can close that tab or leave it open.
No action is required in the library, it is simply provided for your reference. Return to your 3DWW (and Edit Panel) when you are ready to continue.
ADDING OUR FIRST OBJECT
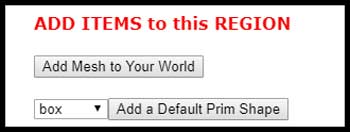
When you are ready,
click the button.

That action will land you here in a scrolling menu of available MESH OBJECTS.
If you followed instructions then you know we are looking for three items:
Boat = #36
You can see our first target at the bottom of this image.
Sand Dune = #85
Palm Tree = #144
Click the button next to each of those items.
Just one click...unless you want a fleet of ships and forest of palm trees!
When you are done, click the button.
There are TWO ways to confirm your objects were added.
OPTION #1
All of your items were dropped at coordinates xyz = "0 0 0".
(the boat is stuck in the top of the palm tree)
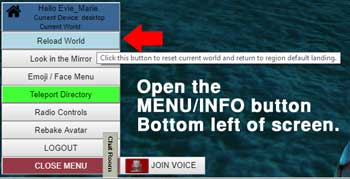
 OPTION #2
Look above for the red arrow pointing to the EDIT TOOL panel.
Click the button.
EDITING OBJECTS
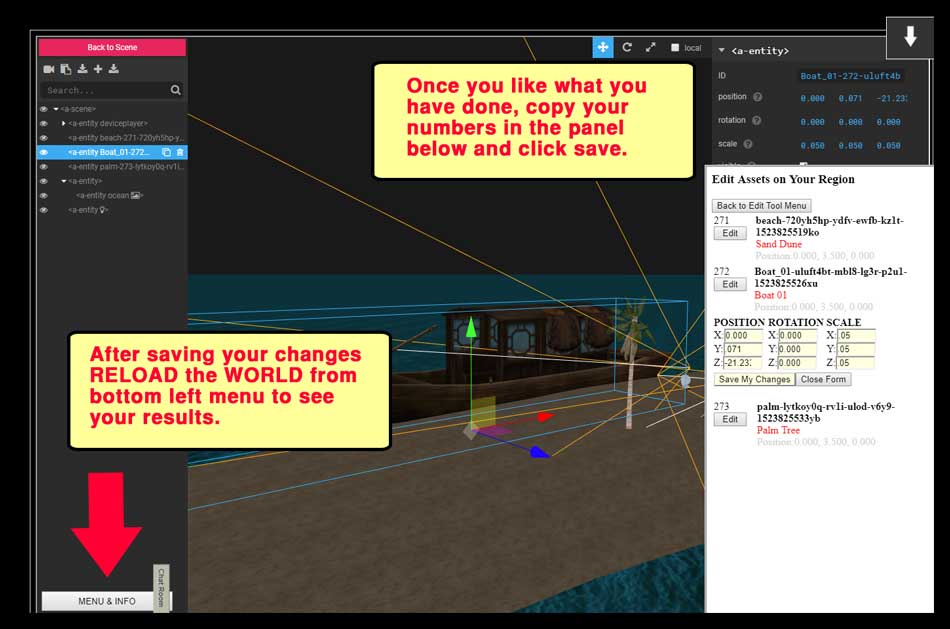
In the image below, we have already clicked the button next to the boat. To drag and drop we need to turn on the 3DWW Inspector. This will allow you to move objects around, but WON'T SAVE your changes until you enter them in the EDIT TOOLS pane. So if you mess everything up. Just reload the page and start over.
CNTL+ALT+I to open the 3DWW Inspector


ADDING & EDITING GEO-PRIMS
Return to the main editing panel using the button at the top. Use this panel to add two items: a box and a sky.
Then scroll to top of same panel and choose .
Use the sky menu to find a sky you like (these are special images) and any of the button options to find a texture for your box.
Hover over the images to get a better view. Write down the RED NUMBER.
 Return to this window when you are ready and click the button.
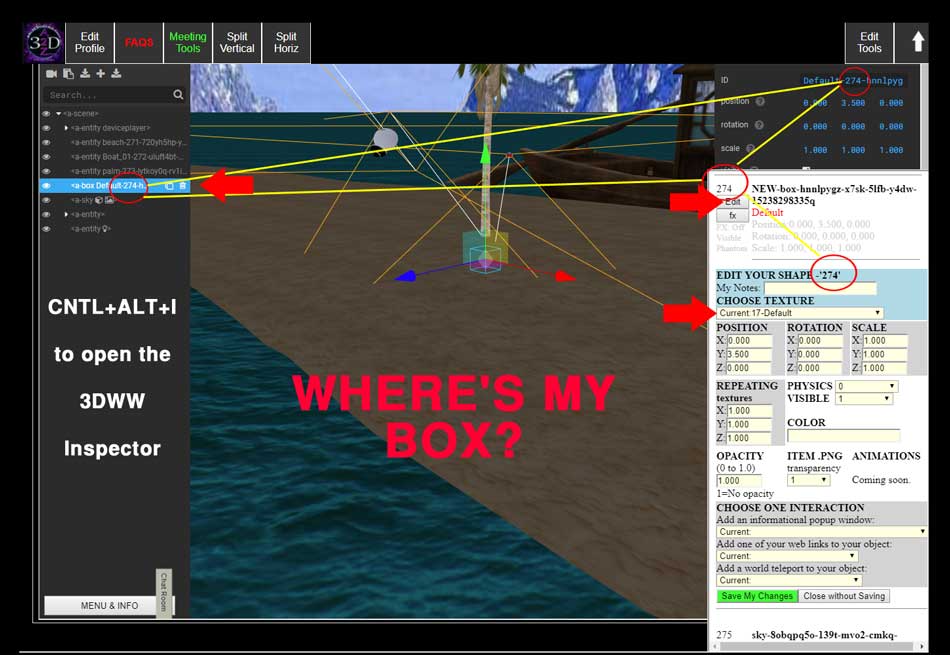 My box was buried under the sand, so by clicking the item in the left panel, I can easily access the move controls.
All new items are saved with DEFAULT until they have been given a texture.
The number just behind the name of the prim is your Region Asset EasyID. You can match it in your Edit Tools Panel if you get confused.
TEXTURES: Pull down the menu and find your number, that easy.
POSITION, SCALE, ROTATION: Use the same method we did above.
When you like what you have done, SAVE YOUR CHANGES and then RELOAD your WORLD to see your results.
As you can see, geo-prim objects have a lot more options. Play around and experiment, and let us know what else you would like to see a tutorial on.
ADDING A SKY
The sky appears to have a lot of options in the edit panel, but the sky is special. You can move it around and rotate it, but if it is a good texture all you really need to do it add it.Click the EDIT button next to the Sky Prim. Choose your texture, SAVE YOUR CHANGES and RELOAD YOUR WORLD.
GEO-PRIM INTERACTIONS

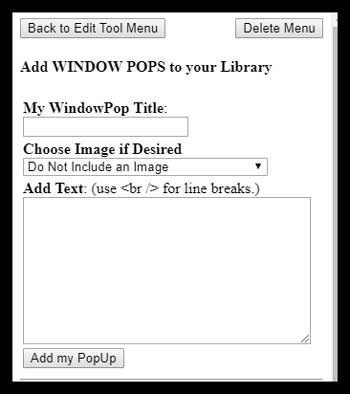 You build internal 3DWW Popup Windows and Link interactions that a user will encounter upon focusing on the item.
Once you save them, they will be listed in the same window where they can be easily edited.
These interactions are part of your personal library and can be used on any of your regions, as many times as you like.
Return to the main EDIT TOOL MENU.
Click the button again, and locate your box.
Click the button again and scroll to the bottom of the options.

Now when someone focuses on your object, they will receive the information you put in the pop-up.
You can't see it on this image, but every pop-up comes equipped with a close button at the bottom. It is added Auto-Magically.
REMEMBER....
You are building in a Browser Based World. After you make your changes you will need to reload your world to feed the browser that new information.Need help? Contact us at the A2Z HelpDesk or flag us down in-world.
Have idea on how to improve this tutorial? Or for a new one? Let us know.
Thank you for visiting us and for your support! We look forward to seeing what you build using this brand new technology!
Copyright © 2018 A2Z Smart Group LLC | All rights reserved worldwide. 3DWebWorldz.com