 3DWebWorldz.com
Building in 3DWW - Uploading Textures
Textures can be placed on any geo-shape prim.
Before we talk about how to upload textures to the system, let's talk about texture sizes.
Improperly prepared images or images that are unnecessarily large will slow down the load time of your world.
Preparing Your Texture Images
There are only two simple rules you need to follow: (1) If you do not need a transparent background anywhere in the image, then save it in .jpg format.
If you need transparency, meaning the image will only take up a portion of the prim, and you want to "see through" the rest of the texture, save your image in .png format.
 (2) Sizing is important, and for best results you need to size your images in the Power of Two. This may distort the proportions on your image if you look at them in your file system, but don't worry, you can rescale the texture inside of the world to the proper proportion.
To clarify, this means you need to save your images with the following dimensions:
8, 16, 32, 64, 128, 256, 512, 1024
You can mix and match these dimensions, for example: 512 x 128
 FAQ: What happens if I don't size my graphics this way?
Even if you don't resize your texture images, the browser will. This takes the browser longer to load your texture as it will call the texture, resize it, and then load it to your world.
For best results, follow the resizing rule.
FAQ: How do I resize an image?
You can use just about any photo/image editing program to edit your image dimensions and prepare it for web and 3DWeb delivery. Free programs that are popular include Gimp and Inkscape
FAQ: My image looks weird now, will it look right when I put it in my 3DWebWorldz?
It will indeed. You can use the "scale" option on the prim to correct the image proportions.
Uploading your Texture Images
Access the Tools
You can only edit textures on a region you own, or a region where you have been given building rights. Click the EDIT TOOLs button on the upper right of your screen to open the edit tools panel.
On the edit panel that opens, click the green button:.
Then click the upload textures button: .
Upload Textures Panel
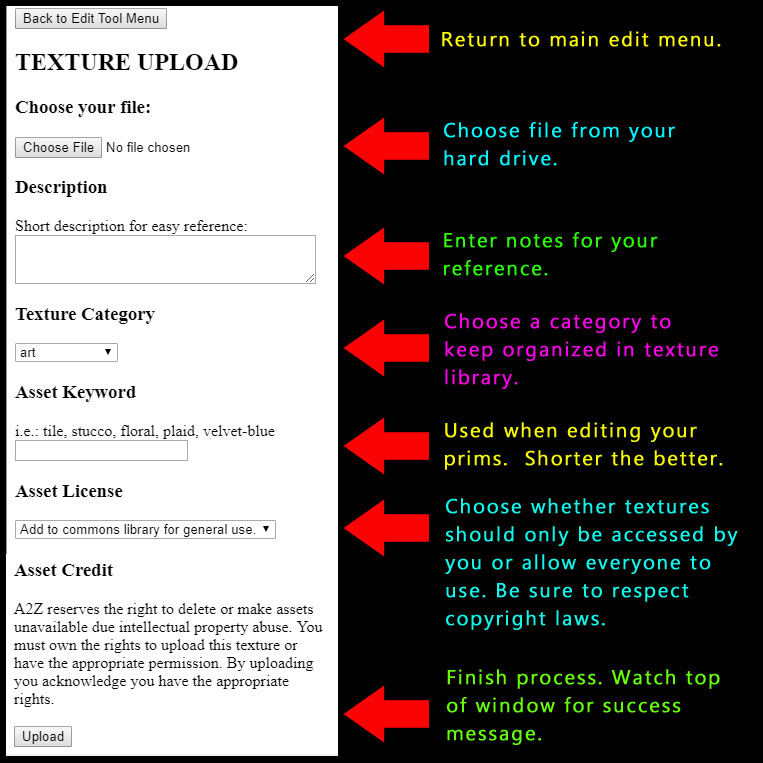
Follow the instructions and click the upload button to complete the process.
Need help? Contact us at the A2Z HelpDesk or flag us down in-world.
Have idea on how to improve this tutorial? Or for a new one? Let us know.
Thank you for visiting us and for your support! We look forward to seeing what you build using this brand new technology!
Copyright © 2018 A2Z Smart Group LLC | All rights reserved worldwide. 3DWebWorldz.com